الخيش مادة شائعة جدًا وتمنحك العديد من الإمكانيات الحرفية. إذا كنت تتطلع إلى إضافة القليل من الريف إلى منزلك أو كنت تحب مظهر الخيش ، فهناك العديد من الأشياء التي يمكنك صنعها!
 لقد قمنا بتجميع قائمة من 100 مشروع DIY سهل يمكنك القيام به باستخدام الخيش. من تنانير السرير والستائر إلى الوسائد وإطارات الصور وحتى ملابس الزفاف ، يمكنك بسهولة تجميع هذه الحرف اليدوية من الخيش وتزيين منزلك أو تقديمها كهدايا.
من السهل العثور على الخيش وهو غير مكلف نسبيًا (فكر في أكياس البطاطس) أو يمكنك شرائه من متجر الحرف المحلي الخاص بك ويتوفر في مجموعة متنوعة من الألوان هذه الأيام أيضًا ، حتى إذا كنت لا تحب اللون البني بشكل عام ، فأنت يمكن العثور على ألوان أخرى لإكمال الحرف الخاصة بك. احصل على هذا الخيش وابدأ في أحد هذه المشاريع الرائعة.
وسادة من الخيش من اللباد
هذه الوسادة الصغيرة هي الطريقة المثالية لإضافة القليل من السحر الريفي إلى غرفة المعيشة أو غرفة النوم الخاصة بك. سواء كنت تضعها على الأريكة أو تستخدمها كوسادة سرير مزخرفة ، فهي جميلة وبسيطة حقًا. الزهرة المحسوسة هي الجزء الأكثر تعقيدًا ولكن حتى هذا سهل نسبيًا. تحتاج فقط إلى ما يكفي من الخيش لصنع الوسادة ثم الحشو بالطبع. هذا سهل للغاية لدرجة أنك قد ترغب في صنع العديد منها لضبط أريكتك ويمكنك تغيير الحجم ليناسب احتياجاتك الخاصة.
تعليمات DIY - Bet1975
قماش الخيش
هذا مشروع رائع مثالي لحفظ الصور أو حتى الملاحظات. يمكنك تعليقها في المطبخ واستخدام مشابك الغسيل لتدوين ملاحظات حول الجداول الزمنية أو الأحداث المهمة. تحتاج إلى شراء لوحة قماشية ، والتي من المحتمل أن تحصل عليها من متجر الدولار المحلي وستحتاج إلى شريط أو زخرفة قماشية أخرى لتثبيت مشابك الغسيل التي تحمل صورك أو بطاقات الملاحظات. يمكنك في الواقع وضع هذا الشيء بأكمله معًا في أقل من ساعة وهو رائع لحمل الوصفات أو أي شيء تريد وضعه عليه.
تعليمات DIY - Akadesign
حقيبة يد من الخيش مع وردة رث
لا يمكنك أبدًا الحصول على عدد كبير جدًا من حقائب الحمل ، وهذه الحقيبة مصنوعة بالكامل من الخيش ، وصولاً إلى الوردة المتهالكة الرائعة على الجانب. يمكنك بالفعل وضع الوردة في أي مكان تريد لكنها تبدو رائعة بجوار الحزام. لاحظ أنك ستحتاج إلى قماش لتغطية الداخل إلا إذا كنت تريده تمامًا من الخيش. هناك أيضًا القليل من الخياطة المطلوبة ، ولكن حتى بالنسبة لبدء المجاري ، يعد هذا مشروعًا صغيرًا رائعًا لن يستغرق الكثير من وقتك وسيمنحك حملًا جميلًا يمكنك استخدامه على الشاطئ هذا الصيف.
تعليمات DIY - Lamaisonreid
غطاء طاولة من الخيش والدانتيل
يا لها من طريقة جميلة لتزيين طاولة الخريف! عداء الطاولة من الدانتيل والخيش سهل الصنع كما هو جميل. يمكنك استخدامه خلال المواسم الأخرى ولكنه سيكون مثاليًا لعشاء الخريف وحتى عيد الشكر. إنه مشروع بسيط أيضًا. عليك فقط قطع الخيش ثم إضافة الدانتيل. يمكنك جعله أوسع عن طريق إضافة دانتيل أوسع أو مجرد إضافة حد رفيع من الدانتيل لجعله أصغر. يمكنك أيضًا تبديل الطول ليناسب طول طاولتك المحدد وسيكون هذا رائعًا حتى لطاولات القهوة أو الخزائن.
تعليمات DIY - الاحتفالات
مزهرية من الخيش الريفي
هذه المزهرية الجميلة مصنوعة بالفعل من علبة صفيح معاد تدويرها. كل ما عليك هو تنظيف العلبة جيدًا ثم لصق الخيش على طول الطريق. سيتعين عليك قص الخيش للتأكد من ملاءمته للطول تمامًا ثم تغطيه بشريط جميل من الساتان أو الدانتيل. يمكنك أيضًا الكروشيه توبر وتشغيل الشريط من خلاله. سيكون هذا رائعًا لحفلات الزفاف لعقد الزهور على الطاولة أو يمكنك فقط جعل عدد قليل منهم جالسًا حول المنزل هذا الصيف يحمل الزهور البرية الجميلة. سيثبت القليل من الغراء الساخن الخيش والأشرطة في مكانها تمامًا.
متوفر في: مزهريات ريفية Etsy Burlap
ستائر الخيش
تخيل المظهر الريفي الذي سيحظى به منزلك عندما تقوم بإنشاء ستائر من الخيش لتعلقها. سواء كنت تريد شيئًا ما في غرفة النوم أو غرفة المعيشة أو حتى غرفة الطعام ، يمكنك عمل ذلك بسرعة كبيرة وليس هناك حاجة للخياطة. تكلفتها حوالي 7 دولارات فقط لكل لوحة وهي أرخص بكثير من الستائر المشتراة من المتجر وهي أكثر تميزًا. إذا كنت ترغب في ذلك ، يمكنك تزيينها قليلاً بأشياء مختلفة أو تبدو رائعة دون إضافة أي شيء.
تعليمات DIY - Fourgenerationsoneroof
لوح طباشير ريفي منزلق مع دعم من الخيش
هذه نسخة رائعة من Pottery Barn ستكون مثالية للحفاظ على تنظيم الرسائل العائلية. يحتوي على سبورة لكتابة الرسائل بالإضافة إلى الخيش لتثبيت الملاحظات أو الوصفات أو أي شيء آخر تحتاجه في متناول يدك. كانت القطعة الأصلية من Pottery Barn (التي لم تعد متوفرة) أكثر من 100 دولار ولكن يمكنك صنعها بنفسك مقابل حوالي 10 دولارات ، اعتمادًا على ما لديك من أجل المشروع.
تعليمات DIY - Prettyhandygirl
جوارب عيد الميلاد من الخيش
نحن ندرك أن الوقت مبكر قليلاً لمشاريع عيد الميلاد ، ولكن هذا المشروع لطيف جدًا لدرجة أنه لا بد من ذكره. إذا كنت ترغب في تزيين مظهر ريفي في عطلة قادمة ، فإن جوارب الخيش هذه مثالية تمامًا. فقط قم بالقياس والقص والخياطة ثم تزيينه بما تريد. الكشكشة غير المطوقة على هذه رائعتين وتعطيهم حقًا مظهر البلد الريفي. يمكنك القيام بالعديد من هذه الأشياء حسب حاجتك للرف الخاص بك أو تخيل إضافتها إلى ديكورات الشرفة الخاصة بك.
تعليمات DIY - Dearlillieblog
تكدرت سرير التنورة
تحتوي تنورة السرير الرائعة هذه على الكثير من الكشكشة وهي مثالية في الخيش لمن يتطلعون إلى إضافة إحساس ريفي حقيقي إلى منازلكم. التنورة في الواقع أسهل بكثير مما تبدو عليه ويمكنك إنشاء واحدة بحجم الملك أو الملكة بناءً على التعليمات. يمكنك أيضًا قصها إذا كنت بحاجة إلى تنورة سرير كاملة أو توأم. الأقواس الصغيرة على الزوايا لطيفة حقًا وتخيل كيف سيبدو هذا مع بعض الوسائد المزخرفة من الخيش على السرير.
متوفر في: Etsy Ruffled Bed Skirt
قائمة عشاء قابلة للمسح
من المؤكد أن هذه القائمة ستزين مطبخك وتخدم هذه الوظيفة الصغيرة المفيدة. يمكنك تتبع جميع الوجبات التي تخطط لإعدادها لهذا الأسبوع. يتيح لك هذا معرفة أن لديك كل ما تحتاجه في متناول اليد ويحافظ على تنظيم جميع وجبات العشاء الخاصة بك بشكل مثالي. المشروع بحد ذاته سهل للغاية ويمكنك استخدام أي مخططات ألوان تريدها حتى تتمكن من مطابقتها تمامًا مع ديكور مطبخك. هذه هي أيضا هدايا رائعة.
تعليمات DIY - Bystephanielynn
وسادة فرينسي مستوحاة من بوتري بارن
هذه الوسادة الرائعة المزينة بحروف واحدة مثالية لأي غرفة نوم وتأتي كاملة مع باقة جميلة من أزهار الخيش. إذا كان لديك بالفعل الخيش والحشو في متناول اليد ، فلن يكلفك هذا أي شيء ، وهو أرخص بكثير من إصدارات Pottery Barn التي يمكن أن تكلف ما يقرب من 50 دولارًا باستخدام حرف واحد فقط. يمكنك القيام بذلك في نسخة أصغر أيضًا لتزيين السرير أو حتى الأريكة إذا كنت ترغب في ذلك ويستغرق إكمالها القليل من الوقت.
تعليمات DIY - Confessionsofaplateaddict
ستارة دش من الخيش
يمكنك إنشاء ستارة دش من الخيش وشماعات رائعة لتتناسب مع كل ذلك دون الحاجة إلى غرزة خياطة. يستخدم هذا المشروع الصغير غراء القماش ومكواة للحفاظ على كل شيء في مكانه. مشابك الغسيل بين خطافات الستائر هي لمسة لطيفة وتجعل الحمام بأكمله يبدو ريفيًا وقديم الطراز. هذا مظهر رائع لأي حمام وأنت لا تحتاج سوى حوالي 5 ياردات من الخيش لإكمال كل شيء ، لذلك فهو حقًا سهل وغير مكلف حقًا ، خاصة إذا كان لديك بالفعل بضعة ياردات من الخيش في متناول اليد.
تعليمات DIY - صنع نصف خبز
أنثروبولوجيا مستوحاة من الجوت الإعصار فانوس
يمكنك صنع فانوس الإعصار الأنثروبولوجي الرائع هذا بقليل من الخيش وبعض خيوط الحديقة وحبل الجوت وبعض الإمدادات الأخرى. ستحتاج إلى حاوية لإنشاء النموذج ولكن يمكنك إعادة تدوير جالون شاي مثلج قديم ، لذا إذا كانت لديك المستلزمات الأخرى في متناول اليد ، فلن تكلفك سنتًا. هذه رائعة لتزيين الأماكن الخارجية الخاصة بك ويسهل صنعها حقًا. يمكنك القيام بالعديد منها والاستمتاع حقًا على سطح السفينة بأناقة هذا الصيف.
تعليمات DIY - التراتيل
إكليل الخيش
يمكنك إنشاء إكليل الخيش الجميل هذا وعمل زخارف مختلفة له حتى تتمكن من تركه معلقًا طوال العام وتغييره قليلاً لمطابقة كل موسم. يستغرق صنع إكليل الزهور وقتًا قصيرًا جدًا وتحتاج إلى عدد قليل جدًا من الإمدادات. يمكنك فقط وضع مادة الخيش على شكل إكليل الزهور الخاص بك ، أو يمكنك صنعه من الأسلاك إذا كنت تفضل ذلك ، ثم أضف أي زخارف تريدها. يستغرق الأمر عدة ياردات من الخيش اعتمادًا على مدى امتلاء إكليل الزهور ويمكنك إضافة حروف خشبية أو زخارف أخرى باستخدام سلك الأزهار.
تعليمات DIY - Theturquoisehome
آلة زراعة النسيج من الخيش
هذه المزارع الصغيرة سهلة الصنع وهي الطريقة المثلى لعرض زهور الربيع الجميلة. بعد أن تغرس زهورك في بطانة ألياف جوز الهند ، يمكنك ببساطة "لف" كل شيء في الخيش وإضافة شريط أو قوس. يمكنك الجلوس مباشرة على الأرض أو الاحتفاظ بها على الشرفة إذا كنت تريد شيئًا ما يلبس جاذبيتك قليلاً. من السهل القيام بها وتبدو جميلة عندما يكون لديك العديد منها مجتمعين معًا.
تعليمات DIY - Themotherhuddle
الستارة من الخيش بدون خياطة
تبدو هذه الستارة الرائعة باهظة الثمن حقًا وأنيقة حقًا ولكن يمكنك صنعها في غضون ساعة تقريبًا وتكلفتها قليلة جدًا. كل ما عليك فعله هو قياس النافذة ، وقطع الخيش ثم تعليقه على النافذة. يمكنك استخدام مسامير تثبيت الورق لتثبيتها في مكانها وسيخفي الخيش المسامير بشكل مثالي حتى لا يتم رؤيتها. تبدو الحواف البالية رائعة في الأسفل وعليك فقط وضع روابط من نوع ما في أي مكان تريده لرفع الستارة كيفما تفضل.
تعليمات DIY - 11 ماغنوليالان
لوحة نشرة من الخيش
لوحة إعلانات الخيش هذه سهلة للغاية وغير مكلفة حقًا. أنت فقط بحاجة إلى لوح من الفلين ، والذي يمكنك الحصول عليه من متجر الدولار المحلي الخاص بك مقابل القليل جدًا ، ومسدس أساسي ، وعدد قليل من مسامير التنجيد وساحة من الخيش. أنت فقط تغطي لوحًا عاديًا من الفلين بالخيش ثم تستخدم مسامير التنجيد لمنحها القليل من الزخرفة. هذا رائع للمطابخ ولا يستغرق وقتًا طويلاً لتجميعه. احتفظ بوصفاتك أو فواتيرك أو أي شيء تريده مثبتًا هنا وذكّر نفسك بالمهام المهمة بأناقة.
تعليمات DIY - Tidymom
أرانب الخيش الأبيض
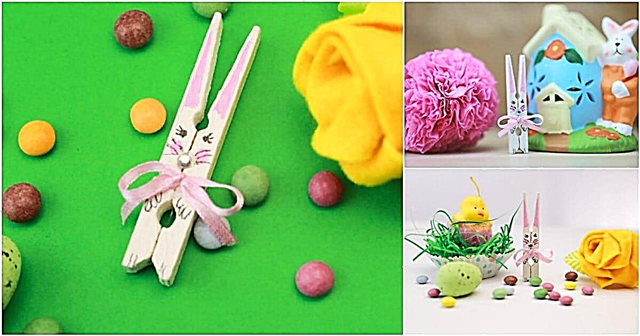
سواء كنت تبحث عن مشروع فريد حقًا لعيد الفصح أو كنت تعشق الأرانب تمامًا ، فأنت متأكد من أنك ستحب مشروع أرنب الخيش السهل هذا. لاحظ أنه ليس عليك فعل ذلك باللون الأبيض. إذا كنت تفضل الخيش الطبيعي (أو أي لون آخر لهذا الأمر) يمكنك استخدام أي لون تفضله. عليك فقط قطع شكل الأرنب من الخيش وتخييطه يدويًا وتذكر أن تملأه قبل أن تغلقه. ستكون هذه رائعة لسلال عيد الفصح محلية الصنع أو في أي مكان تريد زخرفة جميلة وغريبة حقًا.
تعليمات DIY - Cottageatthecrossroads
عاكس الضوء مستوحى من الأنثروبولوجيا
ما عليك سوى حوالي فناء ونصف من الخيش لإنشاء عاكس الضوء الجميل هذا ، والذي سيبدو مثاليًا في أي غرفة في منزلك. يمكنك استخدام قاعدة مصباح قديمة لديك بالفعل أو اختيار واحدة مقابل باك أو اثنين في متجر التوفير المحلي أو بيع الفناء. ثم قم فقط بطلاء القاعدة بأي لون تريده واعمل على الظل المستوحى من الأنثروبولوجيا. ليس عليك حتى خياطة هذا. يمكنك استخدام غراء القماش للحفاظ على الكشكشة معًا ، مما يسهل صنعها بقدر ما هو جميل.
تعليمات DIY - Tatertotsandjello
الخيش القرع
لا تنتظر حتى الخريف لتبدأ في صنع قرع الخيش الصغير الرائع هذا ، والذي يمكنك القيام به بأحجام مختلفة. هذه رائعة لتزيين الخريف من الداخل أو الخارج. هناك القليل من الخياطة المستخدمة لجعلها أسهل بكثير مما تبدو عليه ويمكنك القيام بها بألوان مختلفة إذا كنت ترغب في إنشاء شاشة ملونة وجريئة حقًا. يمكنك حتى تزيين الخيش قليلاً باستخدام أدوات حادة أو علامات أخرى قبل تحويلها إلى قرع لإنشاء عرض فريد حقًا.
تعليمات DIY - تجديد - تجديد
أصحاب أواني الخيش
حوامل الأواني الصغيرة هذه هي الأشياء المثالية لتزيين طاولة عشاء عيد الشكر. بالطبع ، إذا كنت لا ترغب في الانتظار حتى عيد الشكر لاستخدامها ، فهي أيضًا رائعة للقاءات الصيفية. إنها سهلة الصنع ولا يتعين عليك خياطة أي شيء. يمكنك وضعها مع مسدس الغراء الساخن ثم إضافة الزينة أو بطاقات الأسماء أو أي شيء آخر تريد تزيينها. قطعة صغيرة من الخيوط مثالية لإضافة الأسماء أو أي رسالة خاصة تريد مشاركتها مع ضيوف العشاء.
تعليمات DIY - Iheartnaptime
مزهرية ملفوفة من الخيش
سيساعدك مجرد شريط من الخيش ومزهرية زجاجية بسيطة ودانتيل صغير على إنشاء هذه المزهريات الملفوفة من الخيش والتي تعتبر رائعة لحفلات الزفاف أو في أي مكان في المنزل. يمكنك بسهولة استنسل الصور أو الكلمات على المزهريات بالطلاء الأبيض ثم استخدام الدانتيل الأبيض لربطها معًا. يمكنك تغطية أي مزهرية وحتى إعادة تدوير زجاجات النبيذ أو أي شيء آخر تريد تحويله إلى مزهرية مع هذا المشروع. إنه سريع وسهل ويكلف القليل جدًا - لا شيء على الإطلاق إذا كان لديك القليل من الخيش والإمدادات الأخرى في متناول اليد.
تعليمات DIY - أن تكون ساحرًا
علم الخيش DIY
يعد هذا العلم مشروعًا رائعًا إذا كنت تريد شيئًا فريدًا معلقًا في منزلك أو يمكنك استخدامه كعلم خارجي أيضًا. عليك فقط قص الخيش بالحجم الذي تريده ، وإضافة أي رسالة أو صورة تريدها باستخدام الإستنسل ثم إضافة بعض حبل الجوت لتعليق العلم. سيستغرق هذا المشروع بأكمله أقل من ساعة (اعتمادًا بالطبع على الرسالة التي تريد استخدامها وكيفية تطبيق الكلمات) ولن يكلفك أي شيء إذا كان لديك قطعة من الخيش وبعض الطلاء في متناول اليد.
تعليمات DIY - Thewoodgraincottage
أغلفة كب كيك من الخيش
الكب كيك المبطّن بالخيش هو فكرة رائعة لحفلات الزفاف أو في أي وقت تريد فيه إضافة القليل من الأشياء المميزة إلى الكب كيك اللذيذ. إذا كنت تخطط لحفل زفاف تحت عنوان الخيش ، فستبدو هذه رائعة بجانب كعكة الزفاف. عليك فقط لصق الخيش على قالب مغلف كب كيك ثم وضع الكب كيك فيه. يمكنك إضافة أي نوع من الزخارف التي تريدها على الرغم من أن ربطة عنق الجوت أو البرمة تبدو رائعة في المنتصف.
حاملي الشموع من الخيش
ستكون حاملات الشموع الصغيرة هذه مثالية لتزيين الخريف ولكنها ستبدو رائعة خلال المواسم الأخرى أيضًا. عليك فقط قطع الخيش لتغطية حاملات الشموع الزجاجية (أو أي حاوية زجاجية لهذا الأمر) ثم تزيينها كما تريد. تبدو الجوز رائعة عبر الوسط الأمامي ولكن يمكنك استخدام خيالك للزينة. ما عليك سوى لف الخيش حول البرطمان ، ولصقه في مكانه ثم أضف شريطًا خيوطًا في المقدمة لجعله يبدو رائعًا حقًا.
تعليمات DIY - Victoriabrikho
الوقايات من الخيش
الوقايات من الخيش رائعة للداخل أو الخارج. يمكنك استخدامها لتزيين حفلات العشاء الصيفية في الهواء الطلق أو الاحتفاظ بها في الداخل لمنع السوائل من الوصول إلى الأسطح الخشبية. الجزء الأكبر هو أنها سهلة الصنع حقًا. إذا كان لديك القليل من نسيج الخيش في متناول اليد ، فلن يكلفك هذا أي شيء على الإطلاق. ستحتاج إلى مربعات من نوع من المواد لإنشاء الأساس للواقيات ثم تقوم فقط بإضافة الخيش وتزيينها كما تريد. الطلاء يعمل بشكل جيد ويمكنك الرسم مباشرة على الخيش.
تعليمات DIY - أليسااندكارلا
عرض القرط
عرض القرط الرائع هذا مصنوع من الخيش ويتم وضعه في إطار صورة. من السهل حقًا صنعه ويمكنك التقاط إطارات صور مقابل دولار واحد تقريبًا ، لذا فهي أيضًا غير مكلفة للغاية. كل ما عليك فعله هو تدبيس الخيش بحصيرة الإطار ثم طلاء الإطار بأي لون تريده. ستنزلق الأقراط المزودة بإغلاق الخطاف مباشرة في الخيش ويمكنك وضع أنواع أخرى من الأقراط هنا أيضًا. خذ بعض الوقت لتخصيصه قليلاً فقط وهذا من شأنه أن يقدم هدية رائعة لشخص لديه أقراط أكثر مما يعرف ماذا يفعل.
تعليمات DIY - Cucicucicoo
كرسي مطبخ مغطى بالخيش
امنح كرسي المطبخ القديم تحولًا رائعًا من خلال تغطيته بالخيش. حتى لو لم تكن لديك خبرة كبيرة في إعادة التنجيد ، فهذا مشروع سهل إلى حد ما. ما عليك سوى قطع الخيش ثم إرفاقه بمنطقة الجلوس ، بحيث تغطي القماش القديم أو يمكنك إزالة القطعة القديمة أولاً. إذا لزم الأمر ، يمكنك أيضًا إضافة المزيد من الحشو لجعل الكرسي أكثر راحة. هذا مشروع رائع في عطلة نهاية الأسبوع ، خاصة إذا كنت ترغب في استعادة جميع كراسي المطبخ الخاصة بك في الخيش. لكرسي واحد فقط ، لن يستغرق الأمر أكثر من ساعتين.
تعليمات DIY - Boyohboyohboycrafts
الخيش الجيوب Corkboard
سواء كان لديك لوح فلين قديم تريد تغطيته أو كنت ترغب في شراء واحدة من متجر Dollar الخاص بك (كل منها عبارة عن رزمة لكل منها) ، فهذا مشروع رائع يمنح دفعة بسيطة للوحة المذكرات العادية. يتم طي الخيش في مناطق معينة ، لذا فهو يحمل صورًا أو أحرفًا بشكل مثالي ، مهما كان ما تريد وضعه هناك. يمكنك استخدام مسامير تثبيت الورق لتثبيت الأشياء عليها أيضًا ، لذا فهي تعمل حقًا لمساعدتك على الحفاظ على التنظيم والجيوب الصغيرة مريحة جدًا لمن هم في حالة تنقل.
تعليمات DIY - Uncommondesignsonline
لا توجد أكياس خيش خياطة
الأكياس رائعة للإضافة إلى أدراج التسريحة والحفاظ على رائحة ملابسك رائعة. تمتلئ أكياس الخيش الصغيرة هذه باللافندر الطازج ولا تتطلب أي خياطة على الإطلاق. إنها رائعة للأدراج أو الخزائن أو يمكنك صنعها وتقديمها كهدايا. أنت فقط تصنع جيبًا من الخيش ، وتضيف الخزامى الخاص بك ثم الصمغ أو ربطهما معًا. يمكنك تزيينها قليلاً إذا كنت تريد أو اترك بعض الخزامى في الخارج.
تعليمات DIY - Onsuttonplace
تكدرت الخيش مفرش المائدة
يأخذ مفرش المائدة الجميل هذا حوالي 12 ياردة من الخيش بالإضافة إلى بضعة ياردات من قماش الشاش لأسفله. تتميز بكشكشة جميلة مثالية لعشاء رومانسي أو ستبدو رائعة على طاولة غرفة الطعام الخاصة بك طوال الوقت. يمكنك أيضًا إضافة الدانتيل أو أي مادة زخرفية أخرى إذا كنت ترغب في ذلك ، لكنها تبدو جيدة حقًا كما هي. سيتعين عليك الخياطة قليلاً ولكن ما مدى روعة هذا المظهر على طاولة الطعام الخارجية؟ أو يمكنك استخدامه للعطلات أيضًا.
تعليمات DIY - الاحتفال كل يوم
حقيبة الخيش الأرنب
ستبدو حقيبة حمل صغيرة لطيفة كاملة مع أرنب أرجواني (أو يمكنك القيام بأي لون تريده) رائعة في عيد الفصح. يمكنك استخدام هذا في صيد بيض عيد الفصح أو حمله كمحفظة إذا كنت تريد ذلك. إنها حقيبة سهلة نسبيًا ويمكنك حتى إضافة ذيل قطني صغير لطيف لأرنبك لجعلها رائعة حقًا. يستدعي هذا المشروع حقيبة من الخيش تم تصنيعها بالفعل ولكن يمكنك بسهولة صنعها بنفسك وحتى القيام بها بألوان مختلفة من الخيش لتقديمها كهدايا.
تعليمات DIY - Thecasualcraftlete
لافتة من الخيش
زين هذا الخريف (أو الربيع ، الصيف أو الشتاء) بلافتة جميلة من الخيش يمكنك صنعها بنفسك بسهولة. عليك فقط قص القطع للراية ، والاستنسل في كل ما تريد قوله ثم لصق بعض الجوت أو الخيوط على كل قطعة لتثبيتها معًا وتعليقها. سيكون هذا رائعًا حقًا كإشارة لعيد الميلاد أو عيد الشكر أو يمكنك بسهولة تحويله إلى لافتة عيد الفصح مع الأرانب أو أي شيء آخر تريد إضافته.
تعليمات DIY - Iheartnaptime
من السهل الخيش البساط في الهواء الطلق
اصنع سجادة خارجية لطيفة حقًا للترفيه الصيفي باستخدام بعض الخيش والدهانات الأكريليكية والإستنسل وبعض السدادات المصنوعة من الأكريليك. يحافظ السد على حواف الخيش من الانهيار ويساعد على إعطاء الجسم للبساط. يمكنك عمل أي تصميم تريده ويمكنك التقاط الخيش بألوان مختلفة إذا كان اللون الطبيعي لا يتناسب حقًا مع الديكور الخارجي. هذه بساط جميل ولا يستغرق صنعها سوى القليل من الوقت. أضفه إلى سطح السفينة أو الفناء الخاص بك واجعل الديكور الخارجي ينبض بالحياة.
تعليمات DIY - علاج الشقة
ستائر أكياس الخيش القهوة
يمكنك العثور بسهولة على أكياس القهوة القديمة المصنوعة من الخيش على الإنترنت وبمجرد أن يكون لديك زوجان في متناول اليد ، يمكنك صنع أكياس القهوة الرائعة هذه للمطبخ. جوهر المشروع سهل حقًا. عليك فقط قياس نوافذك للتأكد من أن حجم الخيش الخاص بك هو الحجم المناسب ، ثم إنشاء علاقات لربط الستارة بأعلى على قضيب الستارة. ليس عليك حتى الخياطة. يمكنك استخدام غراء القماش إذا كنت تفضل ذلك ويمكن ربط الحلقات بمشابك.
تعليمات DIY - Debbie-debbiedoos
ريفي الخيش العثماني
إذا كان لديك عثماني قديم تحتاج إلى إعادة تنجيده ، فلماذا لا تفعل ذلك في الخيش؟ هذا مظهر رائع يتناسب فعليًا مع أي ديكور لغرفة المعيشة وهو في الواقع أسهل بكثير مما تعتقد. عليك فقط إزالة القماش من العثماني ثم استبداله بما يكفي من الخيش لتغطيته والحصول على القليل من القماش الإضافي للتخلص منه على الجانبين. إذا لم يكن لديك عثماني قديم ، فيمكنك على الأرجح الحصول على واحدة رخيصة جدًا في ساحة البيع أو من متجر التوفير المحلي.
تعليمات DIY - Lizmarieblog 
علامة مغسلة الخيش
ستبدو علامة الخيش هذه رائعة في غرفة الغسيل ومن السهل جدًا صنعها بحيث يمكنك الانتهاء منها في أقل من يوم. ستحتاج إلى إطار لتعليقه وستحتاج أيضًا إلى طباعة الغسيل الصغير اللطيف الذي يقول مباشرة على الخيش. صدق أو لا تصدق ، الطباعة على الخيش سهلة حقًا ويمكنك القيام بذلك باستخدام طابعة عادية. بمجرد أن تتعلم هذه الحيلة الصغيرة المفيدة ، سترغب في طباعة كل أنواع الأشياء على الخيش. عندما تنتهي من الطباعة ، ما عليك سوى تأطير المثل وتعليقه في غرفة الغسيل.
تعليمات DIY - متحدث محلي
أشجار الخيش الشريط
سواء كنت تزين لعيد الميلاد أو كنت تريد شيئًا فريدًا حقًا لتزين طاولة القهوة ، فإن أشجار شريط الخيش هذه مثالية وهي سهلة الصنع تمامًا. يمكنك استخدام مخروط رغوي أو عمل مخروط من لوحة الملصقات ثم لف الخيش الشريطي حوله. يمكنك القيام بذلك بألوان مختلفة لفصلي الربيع والصيف أو الحفاظ على اللون الأخضر الكلاسيكي والأحمر للعطلات ، كل ما تريد. شريط الخيش السلكي يعمل بشكل جيد ويثبت في مكانه بشكل جيد. بالإضافة إلى ذلك ، يمكنك الحصول عليه بألوان مختلفة.
تعليمات DIY - Thegirlcreative
جميل الخيش عيد الميلاد الملاك
لقد حان الوقت الآن للبدء في صنع تلك الزخارف الفريدة لعيد الميلاد ، وهذا الملاك من الخيش ضروري إذا كنت تحب المظهر الريفي. هذه من شأنها أيضًا أن تقدم هدايا رائعة وهي سهلة حقًا. يتم استخدام شريط الخيش السلكي للأجنحة وهناك بعض المستلزمات الأخرى التي ستحتاجها أيضًا. إنها غير مكلفة حقًا ويمكنك تزيينها بأي عدد من الطرق حتى تتمكن من صنع أنماط مختلفة فريدة تمامًا.
تعليمات DIY - Uncommondesignsonline
حلقات منديل الخيش مطرز
تعتبر حلقات المناديل هذه أنيقة حقًا ومثالية لحفلات العشاء الرومانسية أو حفلات الزفاف أو في أي وقت تريد شيئًا خاصًا جدًا. هناك في الواقع طريقتان مختلفتان يمكنك من خلالها صنع حلقات منديل بالخيش وكلها سهلة نسبيًا. إذا كنت تحب مظهر الخرز ، يمكنك قص الخيش وإضافة الخرز ثم خياطة الأطراف معًا لإنشاء الحلقة. من المحتمل أن تعمل الخياطة بشكل أفضل من غراء القماش لهذا المنتج ولكن يمكنك خياطته يدويًا حتى لا تكون هناك حاجة إلى آلة.
تعليمات DIY - Fabyoubliss
الحلي البلد من الخيش
سيحب الأطفال مساعدتك في صنع زخارف الكريسماس الريفية الرائعة هذه باستخدام الخيش. تخيل شجرة عيد الميلاد الخاصة بك مزينة بالكامل بهذه الإبداعات الجميلة. من السهل صنعها ويمكنك الحصول على العديد منها من بضع ياردات من مواد الخيش. استخدم اللمعان والاستنسل وغيرها من الزخارف لتزيينها قليلاً أو يمكنك تركها عادية ، كما تفضل. إنها لا تتطلب الخياطة - يمكنك استخدام غراء القماش بدلاً من ذلك ثم لصق شريط أو خيوط أو أي خيط آخر لتثبيتها على الشجرة.
تعليمات DIY - Ttrinketsinbloom
الخيش توبياري
يمكنك إنشاء هذه الموديلات الرائعة من الخيش بجميع الأحجام المختلفة بحيث تكون مثالية للداخل والخارج. اصنع زوجًا كبيرًا إلى حد ما للوقوف خارج الباب الأمامي الخاص بك أو يمكنك عمل أصغر منها لإنشاء قطعة مركزية جميلة أو عرض طاولة. يمكنك إضافتها إلى أصيص ملون حقًا لاستخدامه في الربيع أو وضعه باللون الأبيض للتزيين خلال فصلي الخريف والشتاء. هذه رائعة. من السهل صنعها ويمكنك فعل الكثير باستخدام توبياري رائع من حيث التزيين.
تعليمات DIY - تصميم الطعام والحفاضات
المفارش من الخيش المطلي بالستينسيل
رتب طاولتك بشكل جيد مع هذه المفارش سهلة الاستخدام. أنت فقط تقطع الخيش الذي تحتاجه بالحجم المناسب ، وتضيف بعض غراء القماش إلى الحواف والحديد - وهذا يمنعهم من الاهتراء ثم استنسل ما تريد. يمكنك إنشاء واحد مع اسم كل فرد من أفراد الأسرة لحفلات العشاء العائلية أو إرسال رسائل خاصة للعطلات. هذه رائعة لأنها تستغرق القليل من الوقت والقليل جدًا من القماش حتى تتمكن من الحصول على عدة ياردات من الخيش. وليست هناك حاجة للخياطة ، لذا فهي سهلة الصنع حقًا.
تعليمات DIY - مفيدة للمنزل
سلة عيد الفصح معلقة على الحائط
لا يزال لديك متسع من الوقت لإنشاء جدار سلة عيد الفصح الرائع هذا المعلق من الخيش. يمكنك استخدام شريط الخيش السلكي الذي يسهل ثنيه واللف والالتصاق معًا جيدًا عند إنشاء بعض الحرف اليدوية. بمجرد الانتهاء من صنع السلة ، يمكنك تزيينها فقط بكتكوت محشي أو أرنب أو أي شيء آخر تريد إضافته. هذا مشروع رائع وسهل جدًا لدرجة أنك لن تصدقه. استخدم هذا لتزيين الباب ويمكنك تخطي زينة عيد الفصح واستخدام ألوان الربيع فقط إذا كنت تريد تركه معلقًا طوال الصيف.
تعليمات DIY - Trendytree
الخيش الجدار شنقا
في غضون ساعة تقريبًا أو نحو ذلك ، يمكنك إنشاء هذا الجدار المعلق على شكل رجل ثلجي ثلاثي الأبعاد والذي سيكون مثاليًا لتزيين عيد الميلاد أو يمكنك صنع عدد قليل منها كهدايا. عليك فقط إرفاق الخيش بالإطارات ثم طلاء الرجل الثلجي. لا يستغرق الأمر سوى القليل من الوقت ، وإذا كان لديك بعض الخيش المتاح وبعض الإطارات الصغيرة ، فلن تضطر إلى إنفاق أي شيء على هذا. يمكنك القيام بها بأحرف مختلفة إذا كنت ترغب في ذلك ، إذا لم تكن مستعدًا حقًا لبدء الحرف اليدوية في عيد الميلاد ، فما عليك سوى القيام بشخصيات الصيف أو حتى أرنب عيد الفصح.
تعليمات DIY - Howtothisandthat
عداء الجدول من الخيش نسج سلة
يبدو مفرش الطاولة هذا معقدًا حقًا ولكنه مشروع سهل للغاية. ستحتاج إلى أن تكون قادرًا على إنشاء تأثير نسج السلة ، وهو أبسط بكثير مما يبدو. أثناء تقدمك ، تأكد من لصق كل قطعة حتى تظل في مكانها تمامًا. هذا عداء رائع لطاولات غرفة الطعام أو يمكنك صنعها بأحجام مختلفة لطاولات القهوة أو الخزائن أو في أي مكان تريده. اصنع نسخًا مربعة أصغر حجمًا لتحل محل المفارش.
تعليمات DIY - Taradennis
إطارات الصور من الخيش
من السهل جدًا صنع إطارات الخيش الجميلة هذه ولا تحتاج إلى أي خشب لصنعها. عليك فقط تغطية الورق المقوى بالخيش من أجل الحصول على إطارات جميلة تبدو وكأنها تكلف ثروة. ستقدم هذه الهدايا الرائعة لأي شخص تعرفه ومن السهل جدًا صنعها بحيث يمكنك إنجاز العديد منها في يوم واحد. ليس عليك أيضًا القيام بأي خياطة. تمسك الخيش مع غراء القماش ثم أضف أي زخارف تريد أن تجعلها فريدة حقًا.
تعليمات DIY - Allthumbscrafts 
أغلفة شمعة باتريوتك يو يو
يقترب الرابع من يوليو وستكون لفات الشموع هذه مثالية للحفلات الخارجية والديكور. قماش Yo-Yos الصغير يزين لفائف الشموع التي يسهل صنعها من شرائط الخيش. ما عليك سوى اختيار الحجم الذي تريده ثم قص واستخدام غراء القماش للحفاظ على الالتفاف معًا. ثم قم بتزيينها بنسيج Yo-Yos أو يمكنك اختيار أي شكل آخر من أشكال الديكور الذي تريده. يمكنك استخدام حاملات الشموع الزجاجية التقليدية أو أن تكون مبدعًا حقًا وأن تعيد تدوير بعض الزجاجات والبرطمانات القديمة.
تعليمات DIY - Thecountrychiccottage
رسالة مؤطرة الجدار الشنق
تعتبر Monograms رائعة لتزيين منزلك وهذا مصنوع من الخشب والخيش مما يجعله فريدًا ورائعًا حقًا. ستحتاج إلى شراء حرف خشبي (أو قصه إذا كان لديك الأدوات المناسبة) ثم رسمه بأي لون تريده. احصل على إطار يطابق أو استخدم إطارًا قديمًا وقم برسمه أيضًا. الدعامة عبارة عن خيش ويتم رفع الحرف بحيث يكون له تأثير ثلاثي الأبعاد رائع. من السهل فعل ذلك حقًا وسيقدم هدية زفاف رائعة إذا كنت تعرف شخصًا سيتزوج هذا الصيف.
تعليمات DIY - Newideasforyou
صندوق قماش من الخيش
احتفظ بهذه المستلزمات الحرفية أو مواد الخياطة أو الحياكة أو أي شيء آخر تريده في متناول اليد ومنظم باستخدام صندوق قماش من الخيش رائع. لا تبدو هذه الصناديق رائعة فحسب ، بل من السهل جدًا صنعها. يتطلب هذا المشروع القليل من الخياطة ولكنه سهل حتى بالنسبة للمبتدئين. سترغب في اختيار قماش لداخل الصندوق وسيستغرق إنشاءه بضع ساعات (ربما ليس طويلاً). هذه رائعة لتنظيم الحمام أو استخدامها كحامل للمجلات.
تعليمات DIY - Ecokaren
رف مجلة مستوحى من الفرنسية
إذا كنت تميل إلى إلقاء المجلات (ربما في الحمام) ، فإن رف المجلات هذا أمر لا بد منه. من السهل حقًا صنعه وسيأخذك أقل من ساعة من البداية إلى النهاية. يتم طي الخيش لأعلى بحيث تقوم فقط بلف المجلات لأعلى وتحريكها في مكانها الصحيح. يمكنك تزيين هذا بالطريقة التي تريدها لكنها تبدو جيدة حقًا في التصميم الفرنسي. من السهل جدًا إنشاء واحد لكل حمام في منزلك أو استخدامه في المطبخ لحفظ جميع مجلات الطبخ الخاصة بك.
تعليمات DIY - Thegraphicsfairy
تنورة شجرة بدون خياطة تكدرت
ليس من السابق لأوانه أبدًا بدء الحرف اليدوية لموسم عيد الميلاد. هذه التنورة الجميلة المصنوعة من شجرة DIY مصنوعة من الخيش ولا تتطلب خياطة على الإطلاق. قد يستغرق الأمر وقتًا طويلاً ، لكن تخيل فقط كيف ستبدو شجرتك رائعة مع التنورة الموجودة تحتها. يمكنك استخدام مسدس الغراء الساخن لتثبيته معًا ويعمل بشكل جيد بشكل مدهش مع الكشكشة أيضًا. الآن ، يمكنك شراء هذه عبر الإنترنت مقابل ما يزيد قليلاً عن 100 دولار ، ولكن لماذا تفعل ذلك عندما يمكنك صنع واحدة مقابل حوالي 20 دولارًا أو نحو ذلك؟
تعليمات DIY - إيفاناد
إكليل من الخيش للصور
إذا كنت تخطط لصنع إكليل من الخيش ، فلماذا لا تخصصه وتضيف صورًا عائلية؟ هذه فكرة هدية جميلة إذا كنت تبحث عن شيء فريد من نوعه لعيد الأم أو فقط اصنع واحدة لنفسك. يتم ربط الصور بأقواس بألوان متناسقة والمظهر العام رائع بكل بساطة. تبدأ بشكل إكليل وبعض أشرطة الخيش السلكية ومن هناك ، يمكنك في الواقع تخصيصها بأي طريقة تريدها لجعلها فريدة تمامًا.
تعليمات DIY - Thistlewoodfarms
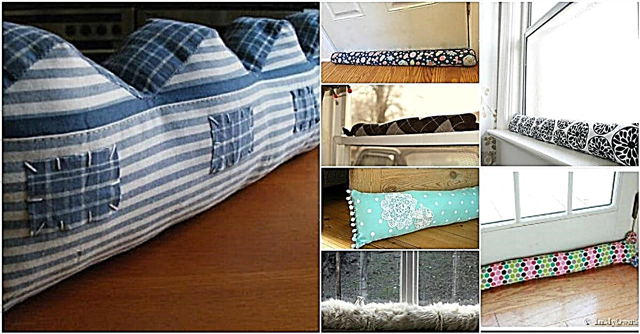
Tufted Burlap Headboard
If you are looking to redo the bedroom, this burlap headboard is the perfect place to begin. Rustic and charming, you can actually make it in whatever size you need for your specific bed. It is really easy and the completed look is lovely. Add some burlap throw pillows and you can completely change how your bedroom looks in less than a day. It doesn’t take nearly as much material or as much time as you may think to create this look and you can embellish with burlap buttons or just anything you want.
DIY Instructions – Thestudiolo
No-Sew Burlap Bow Ties
Imagine your country wedding complete with burlap bow ties. These adorable little ties require absolutely no sewing and they are clip-ons so there are no worries of your guys being able to tie them when they are finished. These take so little time to make and very little fabric for each one so if you are planning a rustic wedding with burlap accessories, a couple of yards will go a long way in making all of the bow ties that you need.
DIY Instructions – Weddingwindow
Stamped Burlap Ornaments
Instead of using the same plain old ornaments this coming Christmas, why not spruce it up a bit by making these adorable stamped burlap ornaments? The project involves putting burlap around foam balls (which by the way are very inexpensive) and then stamping your message across them. You can display any message you want and these would also look great on wreaths or just in a bowl by the front door for added decoration.
DIY Instructions – Blissbloomblog
Stenciled Magnetic Board
Add a little style to those organization areas with an easy to make stenciled magnetic board. The stenciling makes it as elegant or whimsical as you want it to be so you could use it as an art piece which also doubles as a functional magnetic board. Just stencil in whatever pattern you want and if you want, you can add a few embellishments made from burlap like flowers, ribbons or bows. Tie a ribbon or use twine to give it a hanger.
DIY Instructions – Domestically-speaking
Burlap Project Bin
What better place to store all of those crafting supplies than in a great DIY burlap bin? This is a really easy project that won’t even take you a day to complete and once you are finished, you will have a wonderful place to store just about anything. A little burlap, some upholstery tacks and some small wooden bins (think the types that oranges come in) and you’re all set to create an attractive bin that could be used for any number of organization projects.
DIY Instructions – Gardenhouseliving
No-Sew Stenciled Burlap Pillows
Twine bows are used to hold this adorable burlap pillow together so there really is no sewing involved. It’s a great project if you have a couple of hours to spare and the time really depends on how complicated your stenciling is. If you just want a small picture or message, you can finish this up in less than an hour. The twine around the edges is a really nice touch and it gives it a great country feel and all with absolutely no sewing required.
DIY Instructions – Debbie-debbiedoos
Coffee Bag Purse
Forget paying hundreds of dollars for a Dior original. You can make this adorable coffee sack purse yourself for less than $10 – depending on the materials that you have on hand. You will need an old book for the supporting frame and then you just have to sew it all together. It’s actually a lot easier than it looks and you will end up with a bag that very strongly resembles Dior’s coffee bag purse only you’ll have a few hundred dollars left over. If you’re not a fan of the coffee bags, just use plain burlap and maybe a few stencils to get the design that you want.
DIY Instructions – Trinketsinbloom
Burlap Garland
To create a lovely burlap garland, you really don’t need anything except the wired burlap ribbon and some string for hanging. You will need something to weave the ribbon in and out of the burlap but you can use a safety pin or bobby pin for that. Then just bunch up the burlap to create a great poufy ruffled look and tie it up. You can use this for Christmas decorating or just have it on the mantel whenever you need a little extra something.
DIY Instructions – Southerndiydiary
Spring Banner Lampshade
A mason jar is the base for this adorable lamp that has a burlap covered lampshade. While you can buy a lampshade in burlap, it is a lot cheaper to just cover an old one yourself. The best part of this little lamp is the spring themed banner than runs along it. Colorful ribbons complete the look. You could also have spare banners in fall colors or in a Christmas theme so that you can change it around whenever the seasons change.
DIY Instructions – Redberrybarn
Burlap Purse with Shabby Rose Decoration
If you want a really easy sewing project and you are in the market for a new purse, this shabby rose purse is a great choice. The rose is made of burlap and in a contrasting color, it really stands out. You can complete this project in a weekend or even in a day if you are quite the seasoned sewer. It would make a wonderful gift for someone who likes things on the unique side or just make it for yourself. It has loads of room on the inside and is much easier to make than it looks.
DIY Instructions – Lamaisonreid
Barrel Shade Chandelier
While you may not be able to make this entire chandelier, you can certainly make the barrel shade that covers on it. The shade is completely covered in burlap which makes it both elegant and rustic at the same time. You may be surprised at how easy it is to create this look, which would be perfect in a foyer or formal dining room. The entire look will cost you less than $15 and take only about an hour or so to complete.
DIY Instructions – Burlapanddenim
Floral Burlap Clutch
This lovely clutch is both simple and inexpensive to make. You can do it in whatever colored burlap you have on hand or whatever you want and then create the flowers in contrasting colors to make them stand out. This is a great bag for evenings out and easy enough for teenagers to make just in case your daughter wants to create something special for prom. The shape and size of an envelope makes it perfect for times when you don’t have a lot to carry with you.
DIY Instructions – Anightowlblog
Patriotic Burlap Flag
Dress up your front door for the Fourth of July with this great patriotic burlap flag that you can make in less than an hour. You will need a bit of burlap and some blue fabric – denim works really well – as well as the cover of a hardback book to create the shape. You just create a flag with your material and then hang it with twine or another similar material. This is actually great for displaying all year and is so very easy to make, not to mention very inexpensive.
DIY Instructions – Somewhatquirkydesign
Vintage Inspired Feedbag Pillows
You don’t actually have to find vintage feedbags to have pillows that resemble them. You can easily make them yourself and dress up your bed in a great rustic way. You will need to paint the lines so that they resemble vintage feedbags and these work great with burlap. Then just sew the ends together, stuff with whatever you prefer in your pillows and seal it all up. You can also use stencils to create whimsical or vintage sayings on the pillows so that they really look authentic.
DIY Instructions – Retropolitanhip
Vintage Wire Basket
This rustic looking basket would make a wonderful hamper in your bathroom or bedroom or you could make a smaller version and use it for magazines or anything else you need. You just line the inside of the vintage wire basket with burlap and then add any decorations or adornments that you want. If you are using it for décor, just add a few burlap pillows to the top and you’re all set. You could also use it for a gift basket and fill with various other burlap type décor.
DIY Instructions – Gailsdecorativetouch
Burlap and Tin Can Vase Garland
A few up-cycled tin cans and some burlap will give you all you need to create this beautiful garland that you can actually plant flowers in. This would look great anywhere that you need to add a little color or greenery. You could use it in the kitchen for growing herbs or hang it on the porch with seasonal flowers in it. Make sure that you clean the tin cans really well and use a can opener that removes the complete top so that there are no sharp edges. Then just cover with burlap and hang with twine.
DIY Instructions – Foxhollowcottage
Burlap Flower Pot
These burlap flower pots are the perfect way to keep your plantings organized this spring. You can use them for flowers or even vegetables or herbs. You just cover a five gallon bucket with burlap, secure it and then label your pots however you want. Hang some twine around the bucket to hold the label in place and your plants will remain perfectly organized so you’ll always know which ones are which, even before they begin growing. This is a great idea for yards that don’t really have garden space.
DIY Instructions – Too-much-time
Burlap Fall Leaf Decorations
In just a few minutes, you can cut out multiple leaves from burlap to create gorgeous fall decorations. You merely have to trace the leaf shapes and then cut them out. If you love using mod podge, you can use that to hold your leaves onto real twigs or anything that you want to decorate for fall. String them all together and create a banner or just have multiple twigs in a glass vase and display your leaves in their natural habitat. This is a great little project that will help you along with other projects.
DIY Instructions – Foxhollowcottage
Burlap Tiki Torches
Save those empty wine bottles this spring and by summer you could have several gorgeous burlap tiki torches lighting up your outdoor living spaces. If you paint the bottles before you begin, you could have very colorful lighting or you could leave them clear – whichever way you prefer. Make a few burlap flowers to decorate them and then simply create the tiki torches which you can use on your outdoor table or affix them to poles and stick them all around your yard. Burn citronella oil in them to get a nice glow that also wards off pesky bugs.
DIY Instructions – Hometalk
Burlap Baker’s Apron
You can make this really great baker’s apron with no sewing whatsoever. You simply have to cut the burlap (you can use a burlap bag to get the writing that you want) and draw in armholes to cut out. Then just cut out the apron form and use a good fabric glue to attach the black seam. This will also keep the burlap from fraying and it looks great as a contrasting background. These would be perfect as gifts for anyone you know who loves to bake or make one for the special Dad in your life for Father’s Day – he can do all of his grilling in style.
DIY Instructions – Gailsdecorativetouch
Reupholstered Burlap Chair
Instead of throwing out that old chair that seems to be falling apart, why not reupholster it in burlap? If you don’t have an old chair to use for this project you can probably pick one up at a flea market or yard sale for really cheap. Reupholstering is much easier than you may think and when you are finished you will have a beautiful chair that looks great in any room. Add a burlap pillow and it will look even better.
DIY Instructions – Beneathmyheart
Burlap Flowered Lampshade
Take that old lamp that is in serious need of a makeover and create this beautiful flowered lampshade. You can use a new lampshade too if you want. Just create the flowers from burlap and then cut a thin strip for the top and bottom to bring it all together. You can glue the flowers and accents on with hot glue and even cover the entire lampshade if you prefer. This would be great done in different colors of burlap to really make the flowers stand out or you could just stick with a neutral color.
DIY Instructions – Laughterandgrace
Burlap Clothespin Bag
If you love drying clothes outside when the weather permits – not only do they smell wonderful but you can save a lot of energy this way – then you’ll definitely want to put together this burlap clothespin bag. It hangs right on the line so your pins are right there where you need them. You can use a burlap coffee bag that’s already put together or use fabric glue. After all, those clothespins really don’t weigh that much.
تعليمات DIY - علاج الشقة 
Fringed Burlap Table Runner
Table runners are great for decorating and this fringed burlap runner will be a beautiful addition to your dining room table. You simply have to cut the burlap to fit the length that you need and then go through and fray the edges a bit, tying them off so that they don’t continue to fray in the future. This is a really simple project and tying the frays is actually the most time consuming part. You can easily finish this in a weekend and although there is a little sewing required, there’s not much so even if you are new to sewing, this is a great project for you.
DIY Instructions – Cottageandvine
Burlap Sunglasses Case
Keep those sunglasses safe and clean with a burlap sunglasses case that you can make yourself in just about an hour or so. This project requires a bit of sewing and you will want to choose a fabric to line the case so that your glasses don’t get scratched. You can choose whatever way you want to close the case but button closure on the front of this one works really well and is relatively easy to create. These would make great gifts so if you want something really unique for someone special, make them a burlap glasses case. They are sure to love it as much as you do.
DIY Instructions – Craftingagreenworld
Burlap Chevron Paintings
Chevron is a very popular design these days and if you want to add a bit of this design into your décor, these burlap paintings are a great way to do so. You just have to create the design on your burlap and then frame your finished result. These can be done in any color you want and they are so easy to do. Make them in whatever size you want, use whatever colors you want and you can even toggle the size of the design a bit, too.
DIY Instructions – Glueandglitter
DIY Burlap Canvas
Create a beautiful canvas for your home with burlap, a store bought canvas and whatever design or message you want to display. If you are redoing a specific room in burlap, these canvases are a must. You simply cut the burlap to cover a canvas (or several of them if you want something really large) and then paint on the message that you want to display. This is one of the easiest projects ever and it allows you to be completely creative. You could use stencils or just freehand your message to make it look really rustic and charming.
DIY Instructions – Happytogethercreates
Thanksgiving Place Cards
Ok, so you don’t have to use these only for Thanksgiving but they will look great on your holiday dinner table. These burlap place cards are very easy to make and will take very little time so even if you are planning to have several guests for dinner, you can easily make a place card for each one of them. The center is made from chalkboard paint so they are easily reusable with other guests and you can embellish them with leaves or just anything else that you feel like using.
DIY Instructions – Thecountrychiccottage
Pottery Barn Inspired Burlap Candle
If you love Pottery Barn but just can’t bring yourself to pay some of the prices there, you are going to adore this Pottery Barn knockoff candle made from burlap. You can do these in any size you want. You just have to have a candle on hand that you will cover with burlap. Mod podge holds the burlap in place and once you have the burlap on, you just paint over it with gold paint which gives it that great Pottery Barn look without the cost.
DIY Instructions – Myloveofstyle
Burlap Prints
Printing on burlap is not nearly as difficult as it sounds and once you master that craft you can create these beautiful burlap prints that can be framed or hung on their own. You could make several of these and use them as gifts. Everyone loves burlap and who wouldn’t love their own framed print in burlap? You just choose the message that you want and then print it off directly on your burlap fabric. It’s really easy to do and it allows you to create wonderful prints and gifts that will take you literally only minutes to make.
DIY Instructions – Creativetryals
Burlap Jewelry Box
An old cigar box (a wooden one) and some burlap put together create this adorable jewelry box that will be great for keeping your rings and other jewelry perfectly organized. You will need to cut the burlap so that it just fits the width of the box and then cut it long enough so that you can roll it up and stuff inside the cigar box to hold your rings and other jewelry. If you know someone who loves unique gifts, this would be a great one. You can also paint the box if you want but it looks wonderful in its natural color.
DIY Instructions – Mrkate
Bathroom Subway Art
Subway art has become very popular and what could be better than printing that subway art onto burlap. This bathroom subway art is a beautiful way to decorate the powder room and you can colored stones that you can find at your local craft store to decorate it a bit. Just print the subway art off onto your burlap, frame it and then decorate around it. It’s really simple and something that will take you literally only minutes to put together.
DIY Instructions – Domestically-speaking
Burlap Dry Erase Calendar
Keeping the family organized can be difficult. Most people have a calendar of some sort to help them to keep things together and this burlap calendar is a great choice. You can draw the calendar however you need onto the burlap and then simply frame it in a glass frame. The glass is easily written on and then erased away if you use a dry erase marker. You can be very creative and choose frames of any color and even add a few embellishments if you want. This is a great project for organizing your home and using a bit of that spare burlap as well.
DIY Instructions – Simplykierste
Burlap Storage Bins
Who doesn’t love those handy storage bins? They are after all, perfect for keeping things neatly organized and when you make them from burlap, they are just as decorative as they are functional. You will want to have a few boxes on hand to cover but you can use old diaper boxes or anything that is the size that you need. After all, you will be covering them completely with burlap so it doesn’t really matter what they were in a previous life. Once you finish, you can use these to organize virtually every room in the house. They are easy to make and if you have burlap and boxes, they may not cost you anything, either.
DIY Instructions – Blissfulkeeperathome
Burlap Table Bouquet
If you are planning a burlap wedding, these little table bouquets will be perfect for decorating your reception. If you aren’t currently planning a wedding, you can still make these and just use them to decorate around the house. They are simply folded burlap with ribbon tied around to keep them in place and then filled with lovely flowers. You can use whatever flowers you want or decorate them a bit of you want. You can literally make these in about ten minutes each so if you are planning a wedding, this is a really quick way to get those tables decorated.
DIY Instructions – Propcloset
Burlap Wine Bags
If you love giving wine as gifts, try making these great burlap wine bags to hold that wine. Each bag takes only about half an hour and you can decorate them however you want. Use stencils to put messages on the fronts or even add burlap flowers or bows. These are very easy to make and take very little material so a yard or two of burlap will make several of them. Just tie the top up with ribbon or use twine to really make the bag look rustic.
DIY Instructions – Michaels
Recycled Patron Vase in Burlap
Patron bottle vases are elegant and adorable and you can really dress them up with a little burlap. Just cover the vase in lace and then cover the center of the lace with burlap or you could do this vice-versa and put the burlap as the backing. These are great for decorating for parties because they are inexpensive and very easy to make so if you need several, they won’t take days to make or cost you a fortune. Add a flower to each one and you’re all set.
DIY Instructions – Diyinspired
Burlap Wedding Invitations
If you are planning a wedding that uses a lot of burlap, why not incorporate the look into your invitations? With some card stock, a printer and a little burlap you can create beautiful invitations that are sure to be a huge hit with family and friends. These are also great for summer parties and other special occasions when you need to send out invitations. You could also use them as wedding programs to let everyone know who is in the wedding and the venue that you will be following.
DIY Instructions – Intimateweddings
Burlap Boutonniere
Whether you are planning a burlap wedding or you have a special someone going to the prom, these burlap boutonnieres are a great choice. You can cut the form out of an empty cereal box so if you already have the burlap and a few other supplies on hand, you won’t have to spend anything to make these. You could add baby’s breath or other flowers to them and actually customize them to perfectly match any wedding theme. And, they’re a lot cheaper than boutonnieres that you purchase from the florist.
DIY Instructions – Greenweddingshoes
Burlap Door Hanger
Whether your family is filled with football fans, baseball enthusiasts or any other sport, you can create a wonderful door hanger that suits your family perfectly. This burlap door hanger is really easy to create and can be completely customized to fit your family’s favorite sport and favorite team. You just have to cut the burlap to match the form that you need (football, baseball, etc.) and then sew it together and stuff. Once you’re done you can decorate with bows or just anything that makes it special.
DIY Instructions – Greatdaygraphics
Burlap Covered Gifts in a Jar
You know how popular gifts in a jar are. Well, this is a burlap twist on those popular gifts. When decorating your jars, add burlap to the top and then some twine or jute rope for tying. You can use smaller jars and give them away as party gifts or create larger ones and use as gifts for special occasions. The burlap really gives the jars a homey look and you can fill them with your favorite recipes or even jellies, jams or any other yummy goodness.
DIY Instructions – Tinyprints 
Burlap and Mason Jar Storage
Old mason jars and some burlap work really well together in creating this wonderful storage shelf that you can use in bathrooms, kitchens or anywhere you need it. You simply cover a piece of wood with burlap and then affix your jars, which will need to be secured with clamps. These are great for holding Q-tips and cotton balls in the bathroom or you could use them in the kitchen for housing your wooden spoons. The entire project takes less than an hour and gives you a beautiful storage solution.
DIY Instructions – Putitinajar
Burlap Owl Wall Hanging
The kids are going to love helping you to create this whimsical owl from burlap. You need burlap, felt and a few craft supplies and then you can hang your little owl on his own tree branch. Frame it and you have a beautiful wall hanging that is sure to bring a smile to everyone who sees it. This project does not require any sewing. You can glue everything together with a hot glue gun and it’s so easy that you may end up adding more than one owl to your little tree.
DIY Instructions – Urbanhoot
Burlap Picture Matting
If you really want your pictures to stand out when you hang them, replace the matting behind them with burlap. This is a great way to make your entire photo display look rustic. You can purchase frames at the Dollar Store for around a dollar each and then make them really special by adding the burlap and some scrapbooking paper to create a unique mat for each picture. You don’t have to sew or even glue for this one. Just add the burlap and then the picture and the glass from the frame will keep it all in place.
DIY Instructions – Twostorycottage
DIY Burlap Advent Calendar
You can create a beautiful Advent calendar using burlap or you could turn this into a Christmas countdown calendar if you wanted. Actually, you could use it as a normal calendar if you want, just be sure to add a label for each month. If you are making and Advent calendar, you can fill the numbered pockets with small candies or gifts or use plain labels instead of pocketed ones to create a regular calendar. Either way, this is a really easy project and one that won’t cost much, either.
DIY Instructions – Onsuttonplace
Burlap Christmas Trees
These beautiful burlap Christmas trees are inspired by Pottery Barn but they cost much less. You can do these in alternating colors or alternate the burlap with canvas to make them a bit unique. You can make them as tall or short as you want, depending on the size of the cones that you use and you can make them fuller by simply adding more fabric. Once you’re finished, decorate if you want or just leave them plain. There is no sewing required so this is a project that everyone can do and the kids will love to help with it.
DIY Instructions – Myhappynest
Burlap Boot Stuffers
Ok, so this is not technically a décor project but it’s a very helpful one anyway. These burlap boot stuffers are great because they are quick and really inexpensive to create and they work perfectly for keeping your boots from drooping. Two boot stuffers takes only a yard of burlap to create so you can make several of these if you have more than one pair of boots. These are also great for gifts and there is very little sewing required.
DIY Instructions – Shinewithjl